
So after reviewing a number of blog posts and gluing them together to get a process down to migrate windows VM’s to Nutanix Acropolis using KVM as the hyper-visor.
Prerequisites :
Nutanix Acropolis cluster up and running by default there is an NFS share available which we will use to move the XenServer VM’s to.
Linux Ubuntu VM with QUEM installed (blog coming on this shortly) as it was the hardest for me not coming from Linux background.
Steps:
Move Windows VM to NFS share
Convert VHD file to RAW
Create VM on Acropolis using Nutanix image service
Step 1
Set up White list on Nutanix cluster to allow access from your workstation and the XenServer that the VM’s reside

Select Filesystem Whitelists

Add the server IP address with netmask of 255.255.255.255 to dd single server or you can add a network range is required
Select add and close
You can check access by using WinSCP
Connect to the Cluster IP address on port 2222

Username : admin

When connected you can see and browse to the NFS share
Now we have connectivity to our NFS share we need to connect it to our XenServer.
Step 2 – Connect XenServer to NFS

Select New SR

Select NFS VHD
Select Next

Select Next

Enter IP of Nutanix Cluster :/NFS
Select Scan
Select Finish
Note: If running XenServer 6.2 there is a known bug you need to install hotfix CTX141952 or you can add it manually.
Manually introduce SR by: ” xe sr-introduce uuid=<uuid of the directory> type=nfs name-lable=”NFS” shared=true”
– Created the PBD as ” xe pbd-create sr-uuid=<> host-uuid=<> device-config=server=x.x.x.x device-config=serverpath=/NFS ” .This will return a uuid for each host.
– attached those pbds as ” xe pbd-plug uuid=<uuid from the above command> ”
Step 3 – Prepare and move VM to NFS
Shutdown VM and take a snapshot

Before we move the VM we need to install the Nutanix-VirtIO drivers these can be found on the Nutanix web site and its always a good idea to check to make sure you have the latest ones.
Start up your Windows VM
Browse to the Nutanix-VirtIO install msi and complete the install


Note : There are about half a dozen of these drivers you can install all of them unless you know you do not require a certain component

Select Finish
Uninstall XenServer tools

Keep a not of IP address and MAC address as you will need to configure then when you create the new VM on Acropolis, depending on if its set manually of via DHCP
Move the VM to NFS share on Nutanix
Shutdown the VM and and select move VM
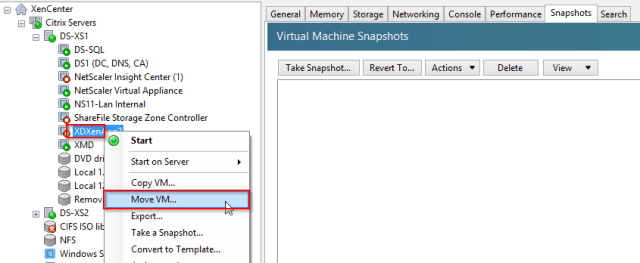
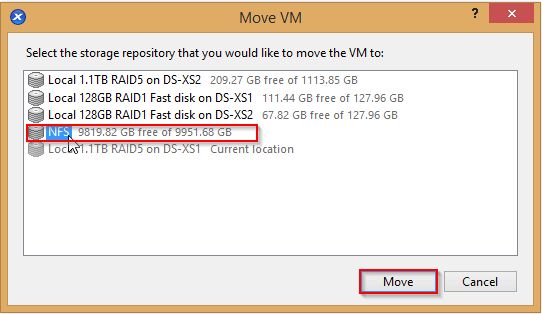
Pick the correct NFS share on the Nutanix server
Select Move
Open up WinSCP and check that you have created a new VHD file

You can also verify it form XenServer Console

Note: If you have VM’s with multiple disks, you will have a .VHD file for each disk . You need to make sure that you attach the correct one to the first disk in Acropolis so that it will allow you to boot and create the VM.
Step 4- Use Linux to convert the .VHD file into a RAW file which is needed for the Acropolis image service create the VM on the cluster.
At this point you should have a Linux VM running QUEM and have the NFS share connected the the VM if not see <<blog post to be created>>
Open a terminal session

move to the director where the nfs share is mounted in my case I have created a mount point under nfs as nutanix and mapped the NFS share form the cluster
$ cd/mnt/nfs.nutanix
moved you to correct directory
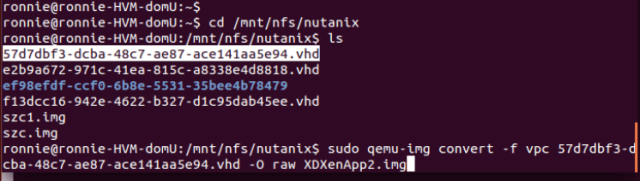
List the contents of the NFS share
$ ls
you should see the VHD file that you have just created.
Note: make sure the VM is shut down from XenServer
The following converts the VHD file to a .IMG (raw) file format
$ sudo qemu-img convert –f vpc servername.VHD –O raw servername.img
replacing servername with the name of the .VHD file created and the new name you are going to use
You will be prompted for the admin password

Enter the password

This will take some time depending on the size of your VM
Step 5 – Create VM on Acropolis
Connect to Nutanix cluster

Select Create VM
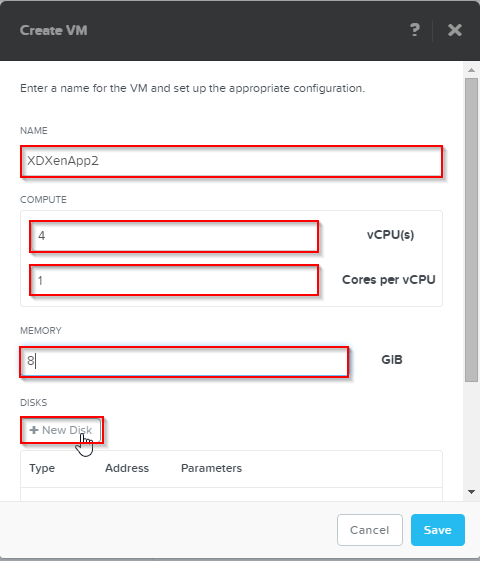
Enter the details required for your VM
Select New Disk
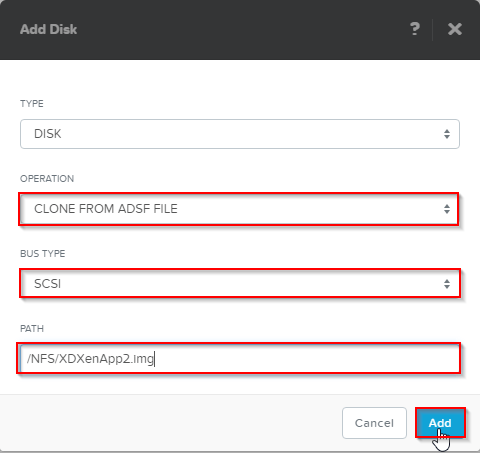
Select Clone from ADFS file
Select SCSI
Enter path to image file = /NFS/servername.img
Select Add
We need to add a network adapter
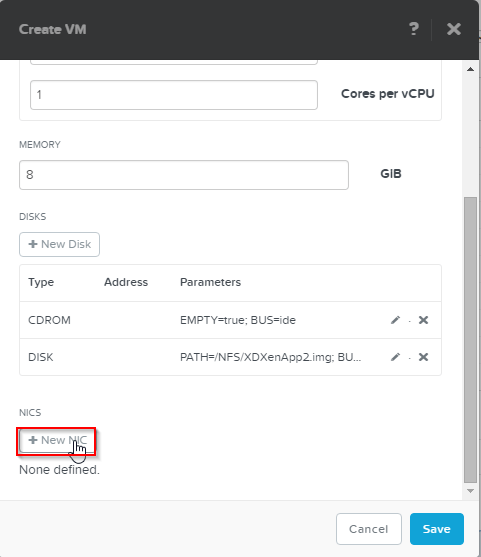
Select New NIC
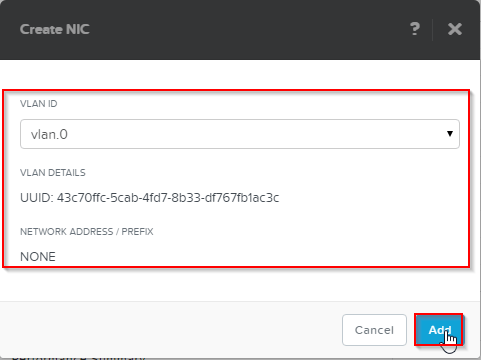
Choose the correct NIC as you could have multiple with different VLANS configured
Select Add
You are now ready to start up the VM on Acropolis

Select the VM you just created
Select power on
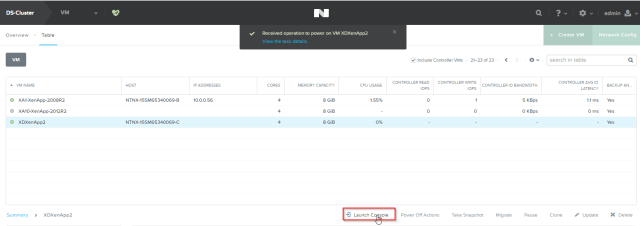
Select Launch console
You VM will open in a VNC window
Log onto your VM and check that the Nutanix-VirtIO drivers are in use

When the VirtIO drivers are in place you are good to go.

This is excellent – thank you! Excited to try it out.
LikeLike