
I’ve been saying this for a while, and with the push from Citrix to a world of Hybrid cloud and the the vast array of apps with many connections to services that will stay op prem for some time to come, the best place to run your desktops will be on Nutanix Enterprise cloud.
The introduction of the Citrix cloud instant on from Nutanix greatly simplifies this for customers. I will walk you through connecting your Nutanix cluster with Citrix cloud to easily provision desktops.
Requirements :
Citrix cloud Subscription
Nutanix Cluster
Windows Gold image.
Step 1 – Set the Access keys on Citrix cloud so you can enable secure access from your Nutanix cluster from Citrix Cloud subscription.
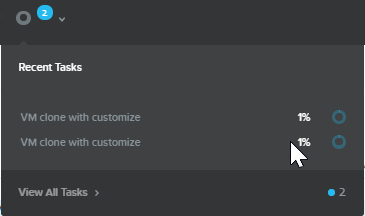
Connect to your Citrix Cloud instance
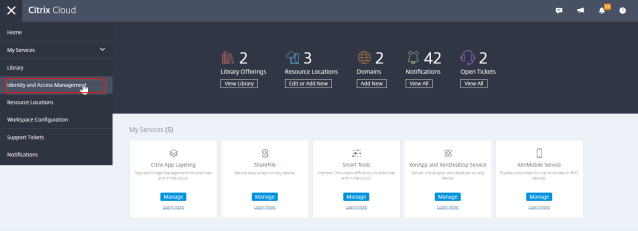
Select – Identity and Access Management
Step 2 – Create your API Keys

Select – API Access
Enter – ConnectionName
Select – Create Client

Download – the CSV file as you will need this to connect from your Nutanix cluster later
Step 3 – Connect to your Nutanix Cluster to create the connection to Citrix Cloud.
From the Pre Reques we need to have a server image fully patched and syspreped, you can also have your Citrix Golden image uploaded here as well. This can all be achieved through the Nutanix Image Service.
Click – Gear Wheel

Select – Connect to Citrix Cloud
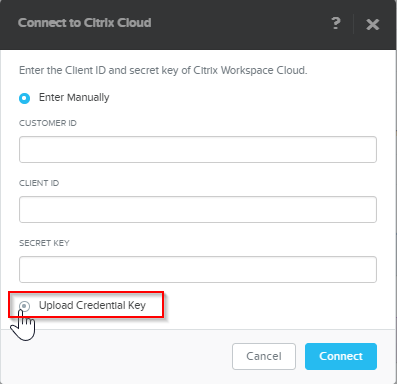
Select – Upload Credential Key
Select – Connect
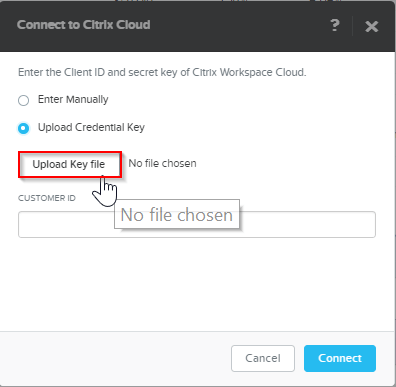
Select – Upload Key File
Select – Connect
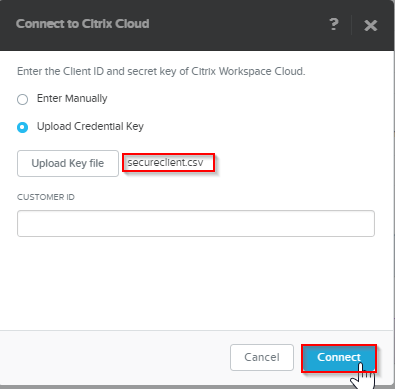
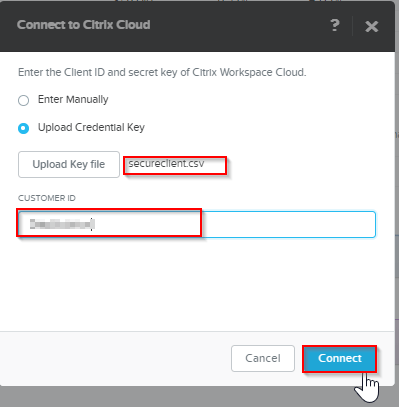
Select – Customer ID ( This can be found on the Citrix Cloud API screen where the keys are created)
Select – Connect
You then need to enter the credentials required to connect and point to the sysprep machine so that the Citrix Connectors are created. It’s the connectors that enable Citrix Cloud to talk to your Nutanix cluster and allow the management of the machines.
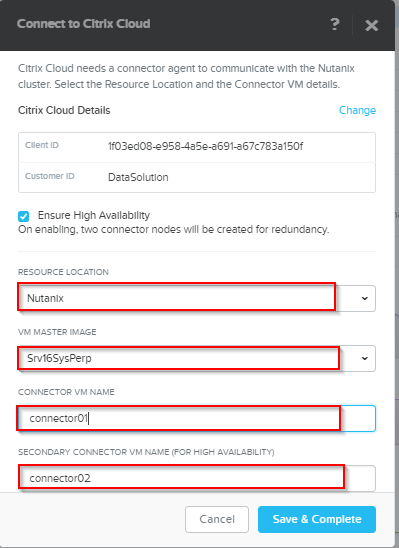
Enter – Name of Resource Location
Select – Sysprep image
Enter – VM names for the connector VM’s
make sure to scroll down …..
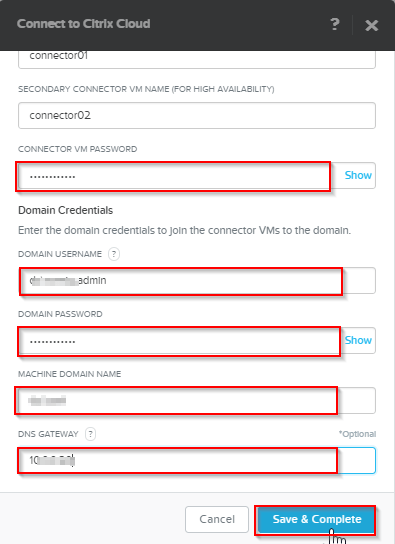
Enter – password for VM
Enter – Domain credentials & Password
Enter – Domain Name ( just your local domain )
Enter – DNS IP
Select – SAve & Complete
Site back and relax
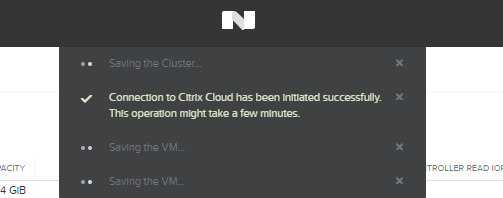
Nutanix will deploy connector
You will be left with your two connectors.

Log back into Citrix Cloud and check your resource location is good.

When you connect to Citrix cloud you will be able to provision VM’S from your gold image that you have copied to your cluster from Citrix cloud.
This is currently available for all Hyper-Visor types with AHV to follow shortly.
I will have a follow up blog on this when released but for now this will let you get testing

Thiis is a great post thanks
LikeLike