
The Nutanix Foundation VM is simple though can be complex at the same time if you are coming from a windows world to a Linux VM and some of the unknowns for a windows sys admin. In this blog I will detail the setup of the Foundation VM so that you will be in a position to start to image your first cluster.
Requirements :
- Laptop with Oracle Virtual box installed
- Copy of the foundation appliance form my.nutanix.com
- The images for Nutanix OS and Hyper Visor
Step 1
- Log onto my.nutanix.com
- Goto the downloads page
- Select Foundation TAB
- Download the latest Foundation tar file

Step 2
- Extract the .tar file to location you will import to Oracle Virtual Box
- This is the location the Virtual Disk for the foundation VM will live

Step 3
- Ensure you download and install the latest version on Virtual Box
- Launch Virtual Box
- Select -> File
- Select -> Import Appliance
- Browse to the folder you extracted the .tar file

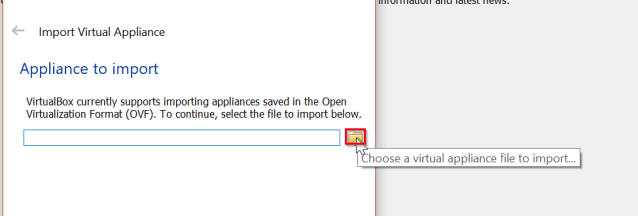
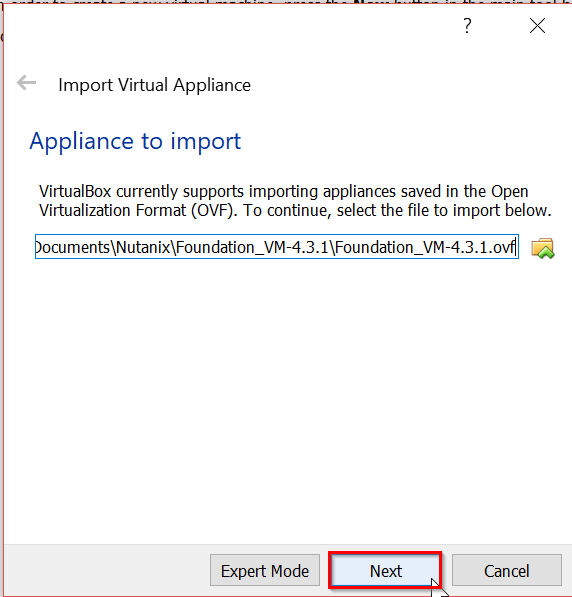
Step 4
- Select the foundation .ovf
- Select -> Open

Step 5
- Select -> Next
Step 6
- Leave all default settings
- Select -> Import
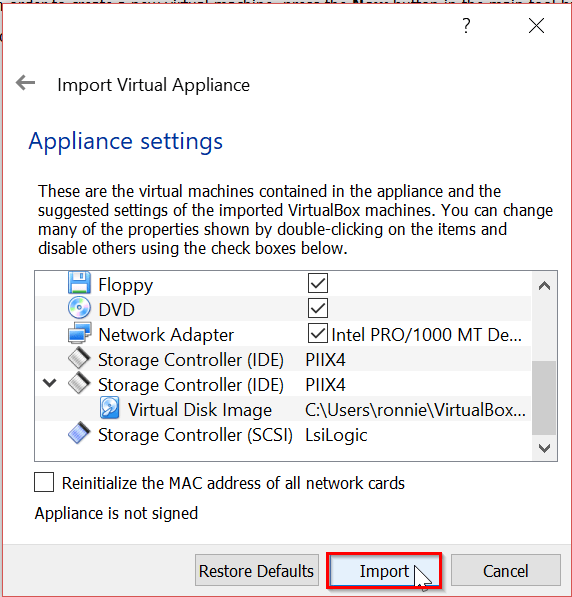
Step 7
- Allow to import

Step 8
- Select -> the imported Virtual machine

Step 9
- Select -> Settings

Step 10
- Select -> Storage
- Select -> Add Optical Drive

Step 11
- Leave the drive empty

Step 12
- Select -> OK

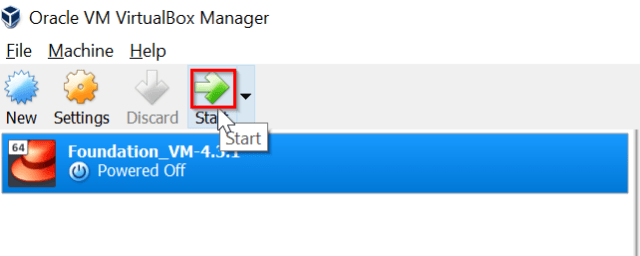
Step 13
- Select -> Foundation VM
- Select -> Start
Step 14
- Select -> nutanix
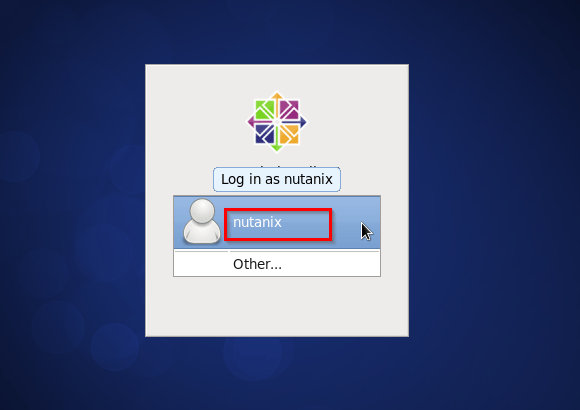
Step 15
- Enter the password nutanix/4u
- Select -> log in

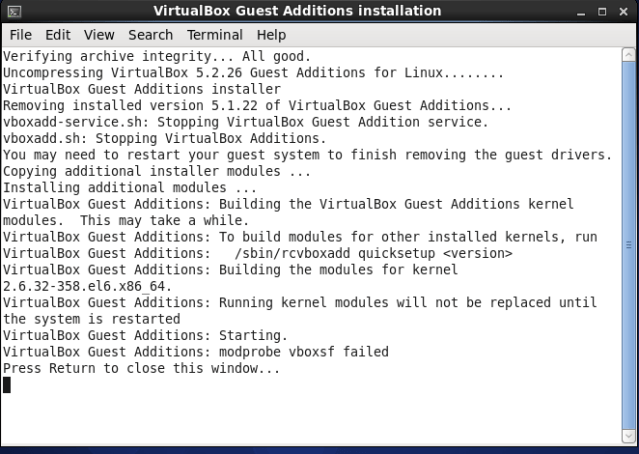
Step 16
- Select -> Devices
- Select -> Insert Guest Additions CD image ..

Step 17
- Select -> OK

Step 18
- Select -> Run

Step 19
- Enter root password
- nutanix/4u
- Select -> Authenticate

Step 19
- Allow to install
- Press -> return
Step 20
- Select -> Devices
- Select -> Drag and Drop
- Select -> Bidirectional
- This allows you to drag files to the Foundation VM to complete the install

Step 21
- From Nutanix Home ->Foundation -> NOS
- Drag the latest NOS file hear

Step 22
- We also need to drag the ISO for which ever hyper you plan to use to the correct location below under isos->hypervisor

I will add to this series over the coming weeks covering off the next steps of running through an install and some things to watch out for on the way.
Note :
If you log in as root with default password you can access any folders shared from Settings –> Shared Folders.
They appear if you are logged in as Nutanix but are not accessible.


Great Document cheers Ronnie.
LikeLike
Hi Ronnie, Great Blog.
I like to deploy the appliance as a VM, isolated in our management VLAN in the DC so that I can still build regardless if I’m in the Data-center or not.
I have also used the foundation edition that is in aNY newly created CVM too but this does not support VLANs.
Thanks
LikeLike
yea I find building it flat and setting VLANS after always works out… the newer version has more support for creating VLAN at build but I haven’t tried it out yet
LikeLike